

How to clean a fuel gear pump?
Hey there! As a fuel gear pump supplier, I've seen my fair share of these nifty little machines. And one thing I know for sure is that keeping your fuel gear pump clean is super important. A clean pump not only works better but also lasts longer. So, in this blog, I'm gonna walk you through the steps on how to clean a fuel gear pump.
Why Cleaning Your Fuel Gear Pump Matters
Before we jump into the cleaning process, let's talk about why it's so crucial. Over time, dirt, debris, and contaminants can build up inside the pump. This can cause all sorts of problems, like reduced efficiency, decreased flow rate, and even damage to the pump components. By regularly cleaning your fuel gear pump, you can prevent these issues and ensure that your pump is always in top-notch condition.
What You'll Need
First things first, gather all the tools and supplies you'll need for the cleaning process. Here's a list of what you should have on hand:
- Safety goggles and gloves: You don't want any fuel or debris getting in your eyes or on your skin.
- A clean, well-ventilated workspace: Fuel vapors can be dangerous, so make sure you're working in a place with good air circulation.
- A container for draining the fuel: You'll need somewhere to put the old fuel when you drain it from the pump.
- A cleaning solvent: There are many different types of cleaning solvents available, but make sure you choose one that's safe for use with fuel gear pumps.
- A soft-bristled brush: This will help you clean the pump components without scratching them.
- A lint-free cloth: You'll use this to dry the pump components after cleaning.
- A torque wrench: You'll need this to properly tighten the bolts when you reassemble the pump.
Step 1: Prepare the Pump
The first step in cleaning your fuel gear pump is to prepare it for the cleaning process. Start by turning off the engine and allowing it to cool down completely. This will prevent any hot fuel from splashing out when you start working on the pump.
Next, locate the fuel pump and disconnect the fuel lines. Make sure you label the lines so you know where they go when you reassemble the pump. You may also need to remove any electrical connections or other components that are attached to the pump.
Once the fuel lines and other connections are disconnected, carefully remove the pump from the engine. Be careful not to damage the pump or any of the surrounding components.
Step 2: Drain the Fuel
Now that the pump is removed from the engine, it's time to drain the old fuel. Place the pump over the container you prepared earlier and open the drain valve or remove the drain plug. Allow the fuel to drain completely into the container.
Be sure to dispose of the old fuel properly. Fuel is a hazardous material, so you should never pour it down the drain or throw it in the trash. Check with your local waste management facility for instructions on how to dispose of fuel safely.
Step 3: Disassemble the Pump
Once the fuel is drained, it's time to disassemble the pump. Start by removing the bolts that hold the pump housing together. Use a socket wrench or a screwdriver, depending on the type of bolts used.
Carefully separate the pump housing and remove the internal components. These may include the gears, bearings, seals, and other parts. Be sure to keep all the components organized and in the same order so you can easily reassemble the pump later.
Step 4: Clean the Components
Now that the pump is disassembled, it's time to clean the components. Start by soaking the components in the cleaning solvent. Let them soak for a few minutes to allow the solvent to loosen any dirt or debris.
After the components have soaked, use the soft-bristled brush to gently scrub them. Pay special attention to the gears, bearings, and other moving parts. Make sure you remove all the dirt, debris, and contaminants from the components.
Once you've scrubbed the components, rinse them thoroughly with clean water. This will remove any remaining cleaning solvent and debris.

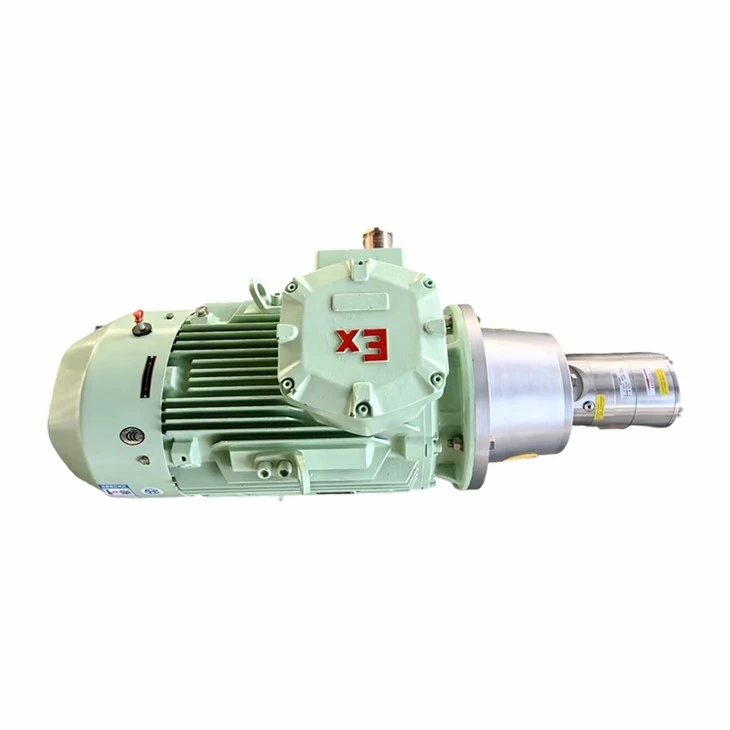
Step 5: Inspect the Components
After cleaning the components, it's important to inspect them for any signs of damage or wear. Look for cracks, chips, or other damage to the gears, bearings, and seals. If you notice any damage, you'll need to replace the damaged components before reassembling the pump.
You should also check the clearances between the gears and other components. These clearances are critical for the proper operation of the pump. If the clearances are too large or too small, the pump may not work correctly.
Step 6: Reassemble the Pump
Once you've inspected the components and replaced any damaged parts, it's time to reassemble the pump. Start by applying a thin layer of lubricant to the gears, bearings, and other moving parts. This will help reduce friction and wear and ensure that the pump operates smoothly.
Carefully place the components back into the pump housing in the same order you removed them. Make sure all the components are properly aligned and seated.
Next, install the bolts that hold the pump housing together. Use a torque wrench to tighten the bolts to the manufacturer's specifications. Over-tightening the bolts can damage the pump, so it's important to use the correct torque.
Step 7: Reinstall the Pump
After the pump is reassembled, it's time to reinstall it on the engine. Carefully position the pump in place and reconnect the fuel lines, electrical connections, and other components. Make sure all the connections are secure and properly tightened.
Once the pump is reinstalled, check for any leaks. Start the engine and let it run for a few minutes while you inspect the pump and the surrounding area for any signs of fuel leakage. If you notice any leaks, stop the engine immediately and tighten the connections or replace any damaged seals.
Step 8: Test the Pump
Finally, it's time to test the pump to make sure it's working properly. Start the engine and let it run for a few minutes. Check the fuel pressure and flow rate to make sure they're within the manufacturer's specifications.
You should also listen for any unusual noises or vibrations coming from the pump. If you notice any problems, stop the engine immediately and inspect the pump for any issues.
Other Types of Gear Pumps We Offer
At our company, we're not just experts in cleaning fuel gear pumps. We also offer a wide range of high-quality gear pumps for various applications. If you're in the market for a new gear pump, check out our Rotary Gear Pump with Motor, Aluminium Gear Pump, and Gear Pump for Oil Transfer. These pumps are built to last and are designed to provide reliable performance in even the toughest conditions.
Conclusion
Cleaning your fuel gear pump is an important part of maintaining your engine's performance and reliability. By following the steps outlined in this blog, you can keep your pump clean and in good working condition. And if you ever need a new gear pump or have any questions about cleaning or maintaining your pump, don't hesitate to contact us. We're here to help you find the right solution for your needs.
References
- Automotive Repair Manuals
- Manufacturer's Specifications for Fuel Gear Pumps
- Industry Best Practices for Cleaning and Maintaining Hydraulic Pumps