

How to align an Aluminium Gear Pump during installation?
Hey there! As a supplier of Aluminium Gear Pumps, I've seen firsthand how crucial proper alignment is during installation. A well - aligned pump not only ensures optimal performance but also extends the pump's lifespan. So, let's dive into how to align an Aluminium Gear Pump during installation.
Why Alignment Matters
Before we get into the how - to, let's talk about why alignment is such a big deal. When an Aluminium Gear Pump isn't aligned correctly, it can lead to a whole bunch of problems. Misalignment can cause excessive vibration, which in turn can damage the pump's components over time. It can also increase energy consumption as the pump has to work harder to function. Moreover, misaligned pumps are more likely to experience leaks, which can be a real headache in industrial settings.
Pre - installation Checks
First things first, you need to do a few pre - installation checks. Make sure the mounting surface is clean, flat, and free of any debris. Any irregularities on the mounting surface can throw off the alignment right from the start. Also, check the pump and the motor (if it's a motor - driven pump) for any visible damage. If there are cracks or other issues, it's best to address them before proceeding with the installation.
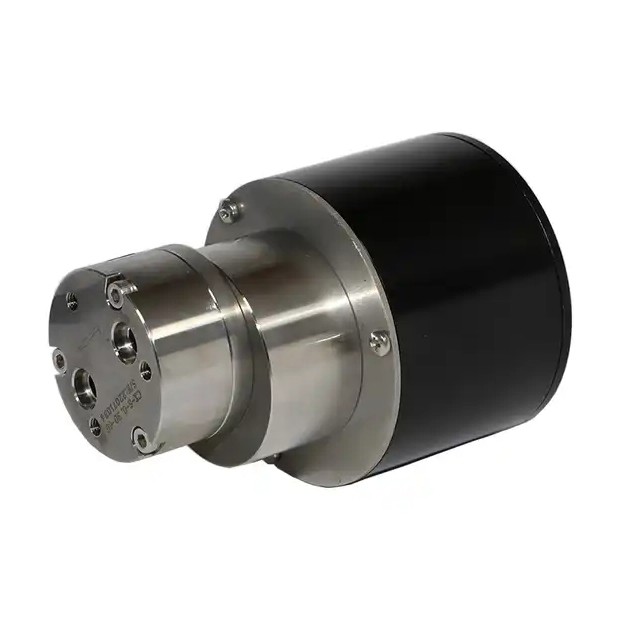

Tools You'll Need
To align an Aluminium Gear Pump properly, you'll need a few tools. A dial indicator is a must - have. It's used to measure the alignment between the pump and the motor shaft. You'll also need a straight edge to check the parallelism of the pump and the motor. A set of shims is important too. Shims are thin pieces of material that you can use to adjust the height and position of the pump or the motor to achieve proper alignment.
Step - by - Step Alignment Process
Step 1: Rough Alignment
Start by placing the pump and the motor on the mounting surface. Use the straight edge to get a rough idea of the alignment. Make sure the pump and the motor are roughly in line with each other. You can use a level to ensure that they are both sitting flat. This rough alignment will make the subsequent fine - tuning easier.
Step 2: Measuring with a Dial Indicator
Mount the dial indicator on the motor shaft. Position it so that the indicator's tip touches the pump shaft. Rotate the motor shaft slowly and evenly. As you rotate the shaft, the dial indicator will show any misalignment. Take readings at different points around the shaft. You're looking for both angular and parallel misalignment. Angular misalignment occurs when the shafts are not at the same angle, while parallel misalignment means the shafts are not parallel to each other.
Step 3: Adjusting with Shims
Based on the readings from the dial indicator, it's time to make adjustments using shims. If the pump is too low, place shims under the pump feet to raise it. If it's too high, remove some shims. For angular misalignment, you may need to adjust the position of the pump or the motor slightly. Keep checking the alignment with the dial indicator after each adjustment. It might take a few tries to get it just right.
Step 4: Final Checks
Once you've made the adjustments, do a final check with the dial indicator. Make sure the alignment is within the manufacturer's recommended tolerance. A good rule of thumb is to aim for an alignment within 0.002 inches (0.05 mm) for most applications. Also, check the alignment again after tightening all the mounting bolts. Sometimes, tightening the bolts can cause a slight shift in the alignment.
Common Alignment Mistakes to Avoid
Now, let's talk about some common mistakes that people make during the alignment process. One of the biggest mistakes is not taking accurate measurements. Make sure you're using the dial indicator correctly and taking readings at multiple points. Another mistake is over - tightening the mounting bolts too soon. This can distort the pump or the motor and throw off the alignment. Also, don't forget to check the alignment after the pump has been running for a while. Thermal expansion can cause the alignment to change over time.
Additional Tips for Long - Term Performance
To keep your Aluminium Gear Pump working at its best, there are a few additional tips. Regularly inspect the alignment. Even if you've aligned the pump perfectly during installation, vibrations and normal wear and tear can cause misalignment over time. Also, make sure to use the right type of lubricant. Proper lubrication reduces friction and helps the pump run smoothly, which can also have a positive impact on alignment.
Our Aluminium Gear Pump Offerings
We offer a wide range of Aluminium Gear Pumps, including the Micropump Gear Pump and the Precision Gear Pump. Our Aluminium Gear Pump is designed with high - quality materials and precision engineering to ensure reliable performance. If you're in the market for an Aluminium Gear Pump or need more information on alignment and installation, don't hesitate to reach out to us. We're here to help you make the right choice and ensure that your pump is installed and aligned correctly.
Conclusion
Proper alignment of an Aluminium Gear Pump during installation is essential for its performance and longevity. By following the steps outlined above, you can ensure that your pump is aligned correctly. Remember to do pre - installation checks, use the right tools, and take your time during the alignment process. If you have any questions or need further assistance, we're just a message away. Contact us today to discuss your Aluminium Gear Pump needs and let's work together to get your system up and running smoothly.
References
- Fluid Power Handbook
- Pump Installation and Maintenance Guides